1. About
Photo Image File Utility is a program to copy or rename photo image files for a provided set of options.
The tool is a learning exercise for me in the field of photography. I started learning digital photography earlier this year (2024). I get to learn aspects of photos, related terminology and ways of managing them. I am a programmer, and I chanced to write this, use it and now share it.
The program is written using Java programming language. This is a desktop application to be run on Windows, Linux or MacOS computers. The program uses an external library (Apache Commons Imaging). This library is used to extract the photo image file's Exif data, the DateTimeOriginal field value (it is the timestamp of photo shot). This date value is used for filtering and organizing by year, month or date.
This tool is free for use.
The rest of this page has instructions - to use, download and run the program.
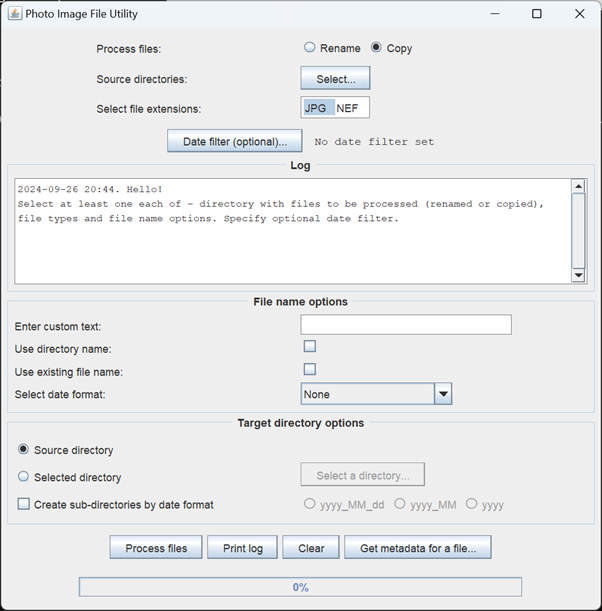
The following is a screenshot of the program running on Windows 11 PC.
2. Instructions to use
2.1. The main section
This is the top part of the tool.
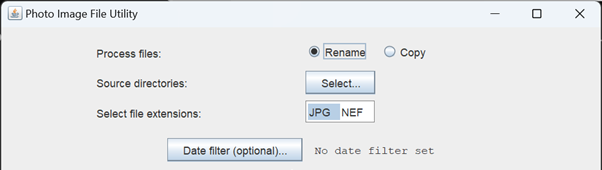
Here you specify:
- The process you want to perform: rename or copy files.
- Select source directories where the files are located.
- Select the types of files (or their extensions, e.g., JPG). You can select multiple types.
These above three selections are mandatory.
The Date Filter is optional. With date filter you can specify a range of dates. This allows select only files within the range. The dates are matched with the file's Exif metadata field DateTimeOriginal (the photo taken timestamp).
In this Date Filter window, you set new date range and save.

2.2. The log
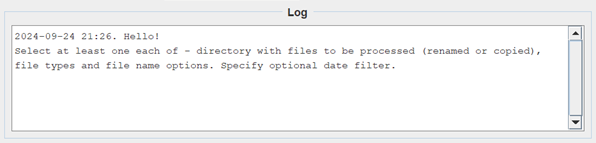
This is a read-only display area. This shows the selections and options you choose, the process details (e.g., how many files were copied or renamed), and other details.
You can view the log in a larger window by double-clicking anywhere in the log area.
You can also print the log to a text file.
2.3. File name options
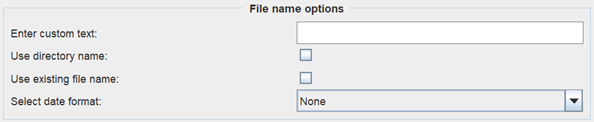
Here you select options to build the file name (from its original name). You must select at least one option.
When you specify multiple options, the file name is built by concatenating each selection.
Custom text is freeform text using alphabets, numbers and the special character "Underscore". For example, "Picnic_2".
The directory name and file name are the selected source directory and file name being processed.
The date format is the Exif metadata field DateTimeOriginal value's format. You can select one of the multiple formats. Some of them are: yyyy, yyyy_MM, yyyy_MM_dd, yyyy_MM_dd_HH_mm, and so on.
For example, a file "DSC_1938.JPG" can be renamed as "picnic-DSC_1938-2024_08.JPG". The renamed file name is a result of specifying three options: custom text, existing file name and the date format "yyyy_MM".
In case a file's new name already exists in the target directory, the program creates the file name with an incrementing serail number. For example, your target file name is "picnic-2024_09_24.JPG" and a file with that name already exists, then you will get a file name "picnic-2024_09_24-1.JPG". The next file name would be "picnic-2024_09_24-2.JPG", and so on.
2.4. Target directory options

Target directory is where you want the renamed or copied files to be move into. This can be the source directory or any other directory you select (this selected directory must be an existing directory).
You can optionally specify if you want to copy or rename the files into directories created as per the file's Exif metadata field "DateTimeOriginal". The program creates the directories automatically and the files are moved into matching directory. The directory name can be any of the three formats. For example, if the format is "yyyy_MM" all the files from a month of year are processed into it. Example directory names are - "2024_08_01", "2024_08" and "2024".
2.5. The bottom toolbar

The four buttons specify their purpose.
You click Process Files to start the copy or rename process. This action opens a Process Panel window. This is a modal window and will be open until the process is complete. While the process is in progress you will not be able to access the main window. You will be able to view the process details in the Log area of main window, as the process progresses.
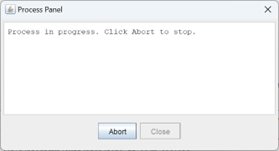
You can stop a long running process by clicking the Abort button of the Process Panel. Note while the process is running, the Close button is disabled and is enabled when the process completes.
Once the process completes, you can return to the main window, view and verify the log.
Back in the main window, you can print the log to a file, by clicking the Print Log button. The log file is created in the directory from where you started the program. The log file name has a format with a timestamp included and is similar to this: "processlog_2024_09_25_10_31_23_70.txt".
Click the Clear button to reset all selections and clear the log area (so that you can initiate the next process).
The rectangle area below the buttons is the Progress Bar. As the process starts and continues, its progress is shown here - both as a percent completed and in animation. This is useful when you process large number of files.
The Get Metadata for a File is to select a photo image file and display its Exif data. This is still work in progress. Only few fields are shown and for the file types presently shown above in the GUI's "Select file extensions" option.
3. Download, install and start
3.1. Requirements
You will need Java SE version 17 or higher on your computer to run this program.
3.2. Installation
Download the application's zipped folder (about 1.2 MB size): Application.zip. This saves the "Application.zip" file in the Downloads folder of your computer.
Extract the zipped folder. The extracted Application folder has the application and related files.
3.3. Starting
From the Application's folder double-click the "application.jar" file. This starts the application and displays the main window.
Optionally, you can create a "shortcut" to the program on your operating system desktop.
You can also start the program from command line:
Prompt> java -jar application.jar
4. More about the application
The application GUI has limited file types to process. I have one camera - a Nikon Z fc MILC. This camera produces image files of two types - JPG and NEF (Nikon's RAW files). I had used the available files to try the application.
In future, I will try to include types as produced by other cameras.
This is the initial version of the program. I will be refining it and try to include new features over coming months.
This application is created by prasad and you can reach him at this email: googuser90 At gmail DOt com.
The Application
This is the initial version of the application and is created on 01-Oct-2024.
The Web Page
This web page is created on 01-Oct-2024.
Return to top